If you are used to connecting to the internet wirelessly, then WI-FI problems are incredibly frustrating for you. Users with systems running Windows 10 experience enough issues already. Connectivity troubles are just a small part of a myriad of misfortunes we see from time to time.
In theory, the WI-FI icon is supposed to appear in the system tray area regardless of your connectivity status. By default, when there is a connection between your PC and a specific network, the icon must again change itself to reflect the new state.
- Is your network or WI-FI icon missing on the Windows 10 taskbar?
- Did you manage to connect to a network successfully but the icon failed to refresh itself automatically?
- Did your network icon suddenly disappear from its location on the taskbar?
- Is your WI-FI icon grayed out and you cannot see any available wireless networks?
If you answered ‘yes’ to any of the questions above, then you have a problem. And you should deal with it. Well, you have come to the right place—we have just what you need.
Pro Tip: It is possible to fix many PC issues by using the PC Repair tool. PC Repair is easy to use and reliable Windows optimization software developed to fix hundreds of system issues.
Special offer. About Outbyte, uninstall instructions, EULA, Privacy Policy.
The exact cause of these problems varies severely depending on a user’s system specifications, personal set up or settings, and so on. We considered this vital fact while trying to compose the ultimate guide for resolving such issues. Soon, you will see the most effective methods of solving the problem of WI-FI icon missing on Windows 10.
How to restore missing WI-FI icon on Windows 10?
The loss of your WI-FI icon is most likely due to the occurrence of events that should never have happened in the first place. We are referring to things like program interferences or conflicts, corruption and file damage, improper alteration of system settings among a host of other problems. Download and run Auslogics BoostSpeed to solve these issues.


We would rather you spared yourself the time and effort required to use the fixes here. In reality, resolving of the missing WI-FI icon is a tiny part of the picture. BoostSpeed can tune up your entire PC performances to incredible levels. However, if you prefer to do it all yourself, you are free to read on.
First, we recommend that you create a system restore point and back up all your files in case things go south. The vast majority of the operations we expect you to perform are entirely harmless, but as we all know, mistakes are sometimes inevitable.
We have added as many fixes as possible to ensure the chances of your issues not being resolved remain ridiculously low. By this, we mean there is a solution for everybody irrespective of the cause of the problem, computer type, user configurations, and events which occurred in the Windows environment.
Start with the first fix and work your way down until you find what eventually works for you. It is doubtful that you will end up having to try all of them.
Check and confirm that the wireless icon is hidden completely:
You have to perform this operation to verify that the WI-FI icon is not hiding in the system tray unknown to you:
- On the bottom right-hand side of the taskbar, you should see a small white arrow pointing up. Click on this arrow to view hidden icons
- If you see the WI-FI icon from the list of images available, just drag and drop it to the taskbar
Ensure that the physical switch for WI-FI is turned on:
Most systems, especially laptops, come with a physical switch or button for turning on and off the WI-FI connectivity.
This button is usually one of the function keys. You might have accidentally pressed the physical button, or some programs might have switched off your internet connection by a process related to the operations of that key.
Find the required key. Press it to toggle your WI-FI connectivity. On some keyboards, you will have to use (or press) the Fn button and the other function keys.
Ensure that airplane mode is turned off:
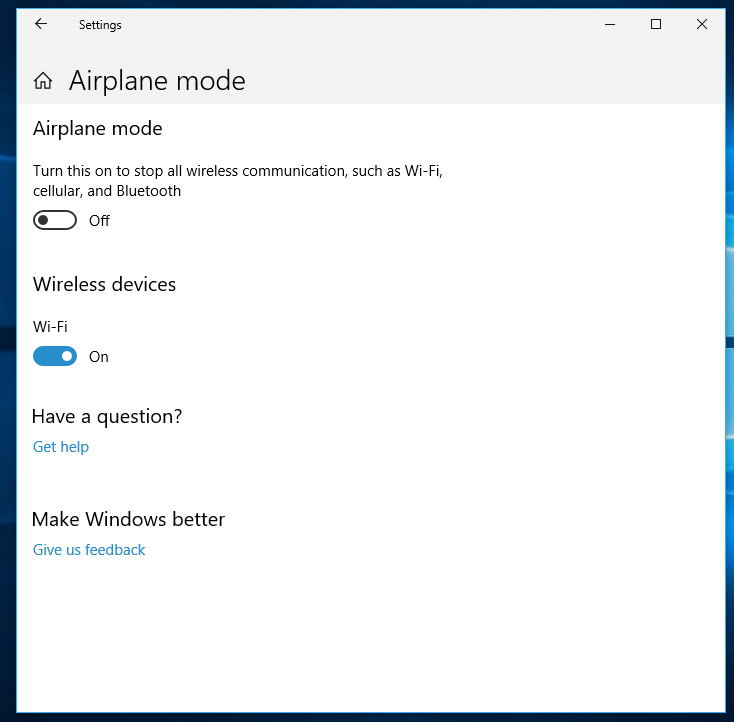
Airplane mode is a useful feature in certain circumstances, but we have also observed that it is the culprit behind several connection issues. Some users stated that their WI-FI icon went missing because Airplane mode was on. Follow these instructions to find out if your case is similar to theirs:
- Open the Settings program. Click on the Network and Internet section
- Click on the tab for Airplane and locate the option for Airplane mode
- Check and see if the Turn this on to stop all wireless communication option is set to off. Otherwise, toggle it off to disable Airplane mode


- Check the taskbar and what you see might surprise you.
Turn on the WI-FI icon in settings:
- Press and hold the Windows button, then press the letter I key to launch the Settings app. If this action fails to work for you, just click on the Windows start icon and select Settings
- Click on System or its icon. You should see a list of items you can manipulate. Select Notifications and actions
- Click on Turn system icons on or off. Now you should see a list of icons for some essential programs
- Check the status of the icon for Network. Toggle it on if it is switched off
- Go back to the menu for Notifications and actions. Click on the arrow located on the top left-hand side of the window you are currently running
- Click on Select which icons appear on the taskbar
- Verify the status of the Network icon here too. Switch it on if you notice that is off
- Exit your current window and check if the WI-FI icon is now visible.
Run the troubleshooter for network adapter:
Microsoft bundled the Windows operating system with a variety of troubleshooters to quickly diagnose and automatically resolve specific computer bugs and other problems.
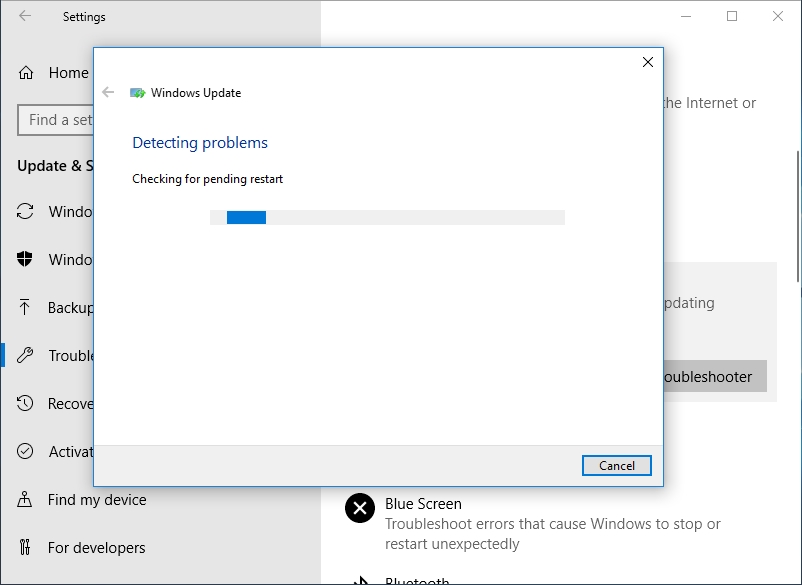
If the WI-FI icon is missing on Windows 10 due to incorrect network settings or system configuration, you can use the troubleshooter to fix the issue:
- Press the Windows button or click on the Windows start icon to see a list of options to select. Click on Settings. Here is an alternative way of opening the Settings app: press and hold the Windows button, then hit the letter I key
- Click on Update and Security. Select Troubleshooter
- Under Internet Connections, click on Run the troubleshooter
- Follow the presented instructions where applicable to help the program do its job


If you were not successful in using the process above, you could run the network adapter troubleshooter:
- Type in and search for troubleshooting in the text box available on the taskbar
- From the presented results, click on Troubleshooting
- Select on View all. You should see a list of troubleshooters
- Select Network Adapter. Click on Next
- Follow the onscreen instructions and carry out any recommended action. Restart your PC if necessary.
Restart the Windows Explorer:
This action is suitable for users whose WI-FI icon is just not updating to reflect the status of their internet connection. A basic rerun of Windows Explorer also helps to eliminate other issues related to wireless connectivity. Do this:
- Right-click on the Windows start icon to see a list of programs or options. Select Task Manager
- Click on more details if your Task Manager window is the one with a restricted view. Under the Processes tab, locate Windows Explorer. You can press the letter W key to find this entry faster
- Right-click on it and select End task. If there are several entries for Windows Explorer, perform the same action on every one of them
- Once you are done, click on File (one of the options located at the top of the window). Select Run new task. A new small window should pop up
- In the available text box, input explorer.exe and tick the checkbox for Create this task with administrative privileges
- Hit the Enter key to run the command you just typed in
- Check if your WI-FI icon has appeared.
Enable the wireless icon from Group Policy:
Only users who possess the Windows Pro or Enterprise edition should carry out the operations involved in this fix. If your system is running the Home version of Windows, you do not have to attempt it.
- Press and hold the Windows button, then hit the letter R key to launch Run. Type gpedit.msc into the available text box and press the Enter key to run the inputted command
- Starting on the left pane, navigate through the following folders: User Configuration > Administrative Templates > Start Menu and Taskbar
- On the right pane, find the option for Remove the network icon. Double-click on it
- Choose Not Configured or Disabled from the options you can see
- Click on Apply. Select OK
- Exit all program windows and restart your PC
- Now check if the WI-FI icon is present
Turn off WI-FI sense:
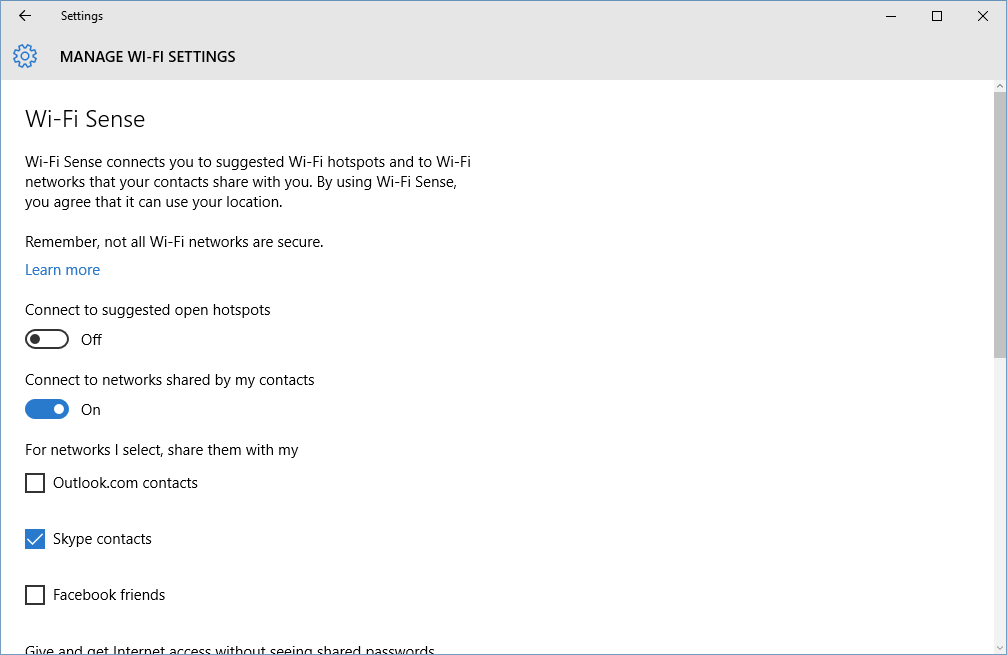
Some users reported that WI-FI sense had been the reason their icon went missing. Follow these instructions on disabling WI-FI Sense:
- Press and hold the Windows button, then press the letter I key to launch Settings. Click on Network and Internet
- Navigate to the tab for WI-FI and click on Manage WI-FI Settings
- Locate WI-FI Sense. Toggle it off
- Reboot your system and see if anything changes


Change the settings for wireless adapter:
- Press and hold the Windows button, then hit the letter Q key. Search for Network and sharing center in the available text box. Select the required program from the presented result
- Click on Change adapter settings located on the left part of the window
- Right-click on WI-FI and select Enable if possible
- Right-click on WI-FI once more but this time select Properties. A new window should pop up
- Under Network, click on Configure. A new window should open again
- Navigate to the Power Management tab. Untick the checkbox for Allow the computer to turn off this device to save power
- Click on OK to save the changes you have just made
- Close all programs and restart your PC
Switch on WI-FI through Windows mobility center:
- Press and hold the Windows button, then hit the letter Q key. Input Windows mobility center and click on the correct application
- Once the program window opens, check for WI-FI and turn on your wireless connection. You might need to restart your PC to let the changes take effect.
Check the WLAN AutoConfig service:
This service is the one that supports the activities of your wireless adapters or WI-FI.
- Press and hold the Windows button, then press the letter R key to launch the Run app. Once the required window opens, input services.msc into the available text box and hit the Enter key to run this code
- A new window with a list of services should show up. Locate the WLAN AutoConfig service. Right-click on it and select Properties
- Under the properties for this service, ensure that the Startup type is set to Automatic and the Service status reads “Running.” Otherwise, change the Startup type to Automatic and click on Start
- Click on Apply. Click on OK
- Restart your computer and check if the WI-FI icon is still missing
Edit the registry:
To perform this fix, you must take certain precautions because mistakes made while working on the registry could be very costly. A registry backup would do you more good than you can imagine if things go wrong.
- Launch the Run app as you have done several times already. This time, type in regedit and press the Enter key to launch the Registry Editor program
- On the left pane, navigate through the following items: Computer \ HKEY_CURRENT_USER \ Software \ Classes \ Local Settings \ Software \ Microsoft \ Windows \ CurrentVersion \ TrayNotify
- Find TrayNotify in the left pane of the window. In the right pane, locate Iconstreams and PastIconStream registry keys. Remove these items by right-clicking on each of them and selecting Delete
- Exit Registry Editor and reboot your system.
Reinstall or update wireless network adapters:
This procedure is the fix you need if your WI-FI icon is missing due to a missing, corrupted, or outdated driver.
First, we uninstall the driver software:
- Open the Run app as usual. Type in devmgmt.msc and press the Enter key to run the command
- Once the Device Manager window opens, locate Network adapters from the list of drivers. Expand or Click on it
- You will see a list of drivers for the network. Right-click on the WI-FI driver and select Uninstall. If you are struggling to identify the wireless network driver, you can uninstall every driver you see in your current location
- After the uninstallation is complete, exit Device Manager and reboot your PC
- Launch Device Manager again, using the instructions from first step here. Click on Action, which is located close to the top of the window
- Click on Scan for hardware changes. This action forces Windows to search for, detect, and install the missing network drivers automatically.
Once your system has completed the installation, restart your PC and see if your WI-FI icon has returned.
If Windows fails to find and install the drivers as expected, then you must search for the drivers required and install them yourself. However, we understand that most users would encounter many difficulties in doing this.
The search for driver software is hardly straightforward, and you must download the correct and latest device drivers from trusted sources. We would prefer you used Auslogics Driver Updater to upgrade your wireless network adapters (or even all your device drivers) to their latest versions in the most efficient and risk-free way possible.


Attempt a complete shutdown of your computer:
If Windows has been failing to turn off your system correctly during every closure, then a full shutdown might be the answer to your problems. These are the instructions for performing a complete shutdown of your PC:
- Launch an elevated Command Prompt. An elevated Command Prompt window is one with administrative privileges or capacity to perform certain critical operations. Press and hold the Windows button, then hit the letter X key to see a list of useful programs or options. Select Command Prompt (Admin)
- After the window opens, type in the following code and press the Enter key once you are done: shutdown /p
- Your system should reboot now. If you see the WI-FI icon when your PC comes on again, then it means this operation was successful in resolving your problem.
Do a Clean Boot:
If you are not familiar with what a clean boot does, we are glad to tell you that it starts up your computer with a minimal set of drivers and services to eliminate the influence of troublesome programs. It is a crucial troubleshooting technique.
- Open the Run app as you have done several times already. Type in the following code and hit the Enter key to run it: msconfig
- You should see the System Configuration window now. On the General tab, select Selective startup
- Untick the checkbox for Load startup items
- Navigate to the Services tab
- Tick the checkbox for Hide all Microsoft services. Now click on Disable all
- Navigate to the Startup tab. Click on Open Task Manager
- Go to the Startup tab in the Task Manager window. Right-click on each startup item and select Disable
- Click on OK in all open windows
- Restart your computer
Create a new user profile:
Sometimes the missing WI-FI icon is a result of corruption, settings, and operations carried out in a particular user account. You might be able to work your way around the issue by using an entirely new user profile to access Windows:
- Open the Settings app as you have done earlier
- Click on Accounts. Click on Family and other people
- Click on Add someone else to this PC to create a simple user account
- Input the details for this account: username, password, password hint and finally, click on Next
- Once Windows has finished creating the account, you must restart your PC. Now, sign in with this account. Check if the missing WI-FI icon problem occurs with the use of this new profile.