“Successful people do what unsuccessful people are not willing to do.
Don’t wish it were easier; wish you were better.”
— Jim Rohn
Pro Tip: It is possible to fix many PC issues by using the PC Repair tool. PC Repair is easy to use and reliable Windows optimization software developed to fix hundreds of system issues.
Special offer. About Outbyte, uninstall instructions, EULA, Privacy Policy.
It can be very problematic when Windows devices malfunction
This is because many computer users do not know how to solve this problem when it arises. Many Microsoft customers ask “what if a device won’t start on Windows?” Don’t be alarmed if your Windows devices malfunction. In this article, we are going to systematically show you how to fix Windows devices if they can’t start. This failure can occur in any version of Microsoft’s operating systems, including Windows 10. Users still encounter this issue with Windows devices in 2018.
First, make sure that any PCI or ISA card which is connected to your computer (for desktop PCs only) is firmly seated in its slot. Also, check if it is switched on.
If there are any external devices connected to your PC, switch them off and then on again. Also, try plugging them to your PC, using a different port.
Note that the devices which are present in Device Manager are called Windows devices. So, the Device Manager panel should be our area of focus when we are dealing with the failure of Windows devices.
The most prominent reasons for that are outdate or incompatible drivers and device malfunctions.
Solution 1. Troubleshoot hardware and devices on your PC.
- Right-click on the Start or Home button and select Settings.
- In the Settings panel, select Update and Security.
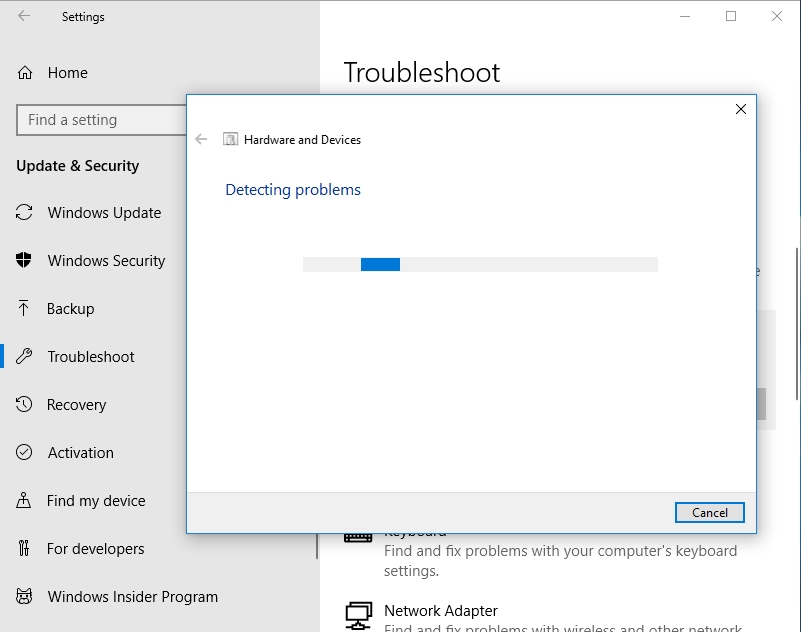
- Navigate to Troubleshoot, then scroll down to Hardware and Devices.
- Click on Run the troubleshooter


Windows will now look for problems with your devices and try to solve them.
Solution 2. Download and install Auslogics Driver Updater.
This is a simple and very comfortable method to update your drivers, especially if you are not a professional. This tool will automatically search for your drivers online, download and install them.


Solution 3. Replace your missing or corrupt drivers.
Usually, you can check if any of your Windows devices is not functioning properly by taking the following steps:
- Click on the Start or Home
- Type Control Panel in the search box and press Enter.
- Click on System and Security in Control panel.
- In the next window, select System.
- Now, in the left side of the window, select Device Manager.
- Right-click on a system device and select Properties.
- Under the General tab, if the device is the culprit, you will see a message indicating that the device is not functioning properly.
When you have identified the device which has malfunctioned, there are many ways you can fix the problem
- By rolling back the driver to a previous version. This option is available if the driver has been updated.
- Click on the Start or Home
- Type Control Panel in the search box and press Enter.
- Click on System and Security in Control panel.
- In the next window, select System.
- Now, in the left side of the window, select Device Manager.
- Right-click on a system device and select Properties.
- Go to the Driver tab and select Roll Back Driver. This will return the driver to its previous functioning state.
- By completely uninstalling the device from your system.
- Click on the Start or Home
- Type Control Panel in the search box and press Enter.
- Click on System and Security in Control panel.
- In the next window, select System.
- Now, in the left side of the window, select Device Manager.
- Right-click on a system device and select Uninstall device. When your system reboots, it will automatically install a functioning device for your system.
- Update the driver.
- Use the above steps to get to Device manager.
- Right-click on the system device which driver you want to update.
- Select Update driver.
- In the next window, choose the option to search for the driver online.
- Windows will search for the best driver for your device and install it.
- Restart your PC.
Alternatively, you can manually search for the driver online. Go to the device manufacturer’s site and download the latest version of the driver provided. This is to ensure compatibility. Note that if you download and install the wrong driver, it will cause more harm to your PC. So, be careful when downloading and installing the driver.
Solution 4. Restore your computer to a previous date.
This option will work if your system has created restore points. Windows automatically does that when an important change wants to take place in your system. You can also manually create restore points for safety purposes.
- Click on the Start or Home
- Type Control panel in the search box and press Enter on your keyboard.
- In the Control panel search box, type Recovery and click on it in the available options.
- Click on Open System Restore in the Recovery window.
- Windows will now guide you through the recovery process.
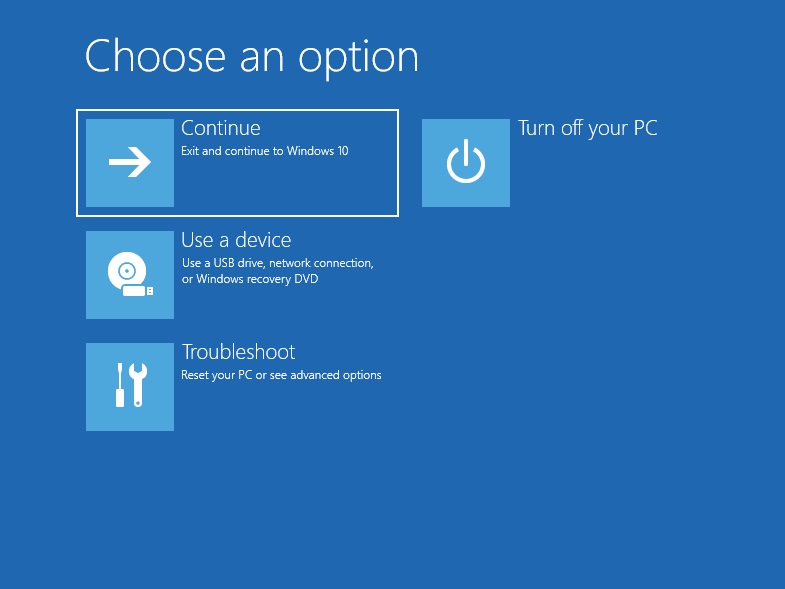
- You can also get into the “Restore” option from the “Choose an option” screen.


Solution 5. Perform an Advanced startup repair.
- Click on the Start or Home button and select the Settings
- Click on Update and Security.
- In the left side of the window, select Recovery.
- Under the Advanced startup option, select Restart now.
- Windows will now restart into the “Choose an option” screen.
- Select Troubleshoot.
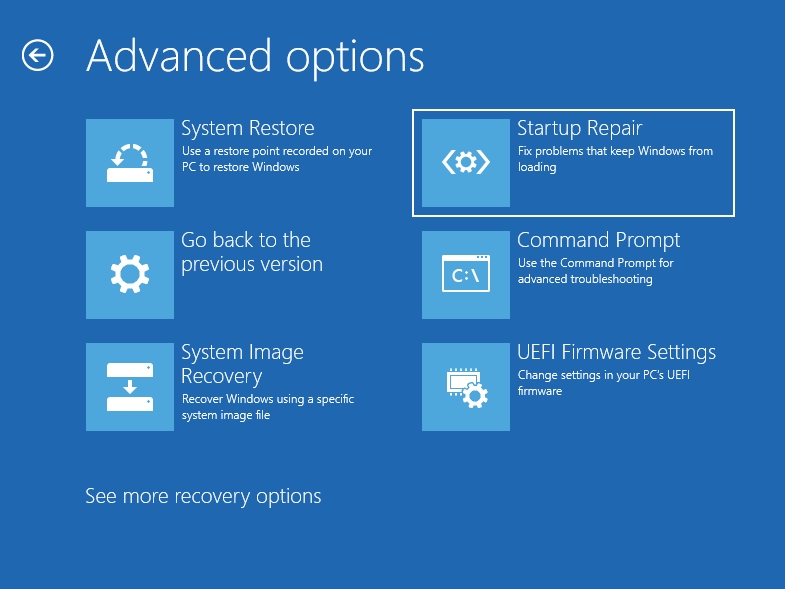
- On the “Troubleshoot” screen, select Advanced options.
- Now, select Startup repair.


- Windows will now guide you through the repair process.
Solution 6. Install the latest Windows service pack and updates
Microsoft also releases updates for Windows. They contain fixes for the problems which users have reported.
- Click on the Start or Home button and select the Settings icon.
- Navigate to Update and Security.
- Now, click on Check for updates.
- Windows will look for updates and install them.


Restart your computer and check if the problem is solved
Solution 6. Delete UpperFilters and LowerFilters Registry Values.
This is a simple process that should not take more than 10 minutes. But be careful when dealing with registry values because altering them to wrong values can cause your computer to malfunction. Make sure you back up the registry files you are about to modify.
- Press Windows key + R on your keyboard to open the Run dialogue box.
- Type regedit in the Run search box and press Enter.
- Locate the folder: HKEY_LOCAL_MACHINE\SYSTEM\CurrentControlSet\Control\Class
- Expand the Class key and you will see a list of subkeys. They represent your hardware in Device Manager.
- Now you need to determine the correct class GUID for the malfunctioning device. Click on the subkey corresponding to your device’s class GUID.
- Look for the UpperFilters and LowerFilters and delete them.
- Restart your computer.
Solution 7. Use a powered USB hub.
Sometimes the USB ports on your computer can’t read the devices plugged into them. So, you need a powered USB hub to be able to use these devices.
I hope this article has solved the problem with your Windows devices. Make sure to share this article with others facing the same issues.
We appreciate your ideas and comments. Feel free to ask any questions regarding this topic.